From responses I received from the survey, you’re wondering what is the difference between contouring, bronzing & where does highlighting fit?
You’re about to learn the tools, products & techniques required to perfectly sculpt your face. It’s about enhancing your natural features & literally putting your best face forward.
I’m sharing how create a mini face lift with a few products & brushes.
As we age our face shape changes, sculpting once we’re past 40 is very different to when we’re in our 20’s & 30’s. Our temples tend to hollow out, jaw lines become less defined & our under eyes become more hollow. This is where the magic of sculpting becomes an asset in your beauty game.
As mentioned in previous blogs skin prep & priming are your first steps to looking younger, followed by your favourite foundation.
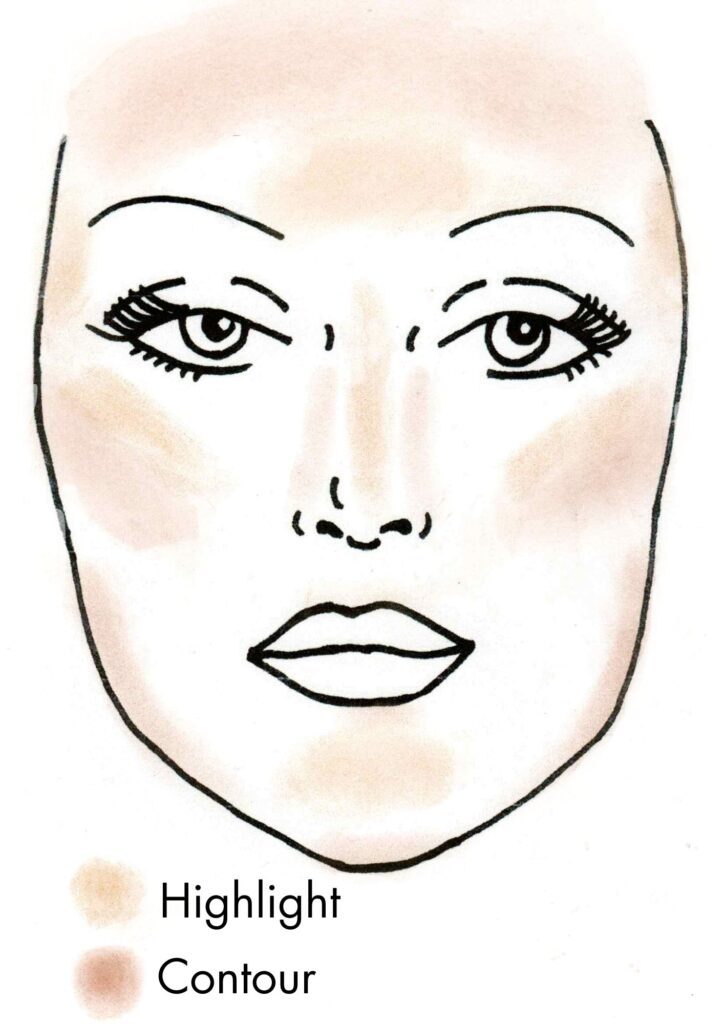
What is Contouring, Bronzing & Highlighting
Contouring is adding shadow to certain features of the face helping minimize these areas, making them recede. It creates a chiseled, defined, lifted affect by the use of cool colours.
Bronzing adds warmth & is applied to areas of your face the sun naturally hits. Such as the forehead, bridge of the nose & tops of cheeks. Think warm coloured products.
Highlighting products whether they be powder or cream, will bring light to the face & push areas forward, enhancing that feature.
When you marry these 3 skills together you can achieve the most beautiful, youthful version of you.
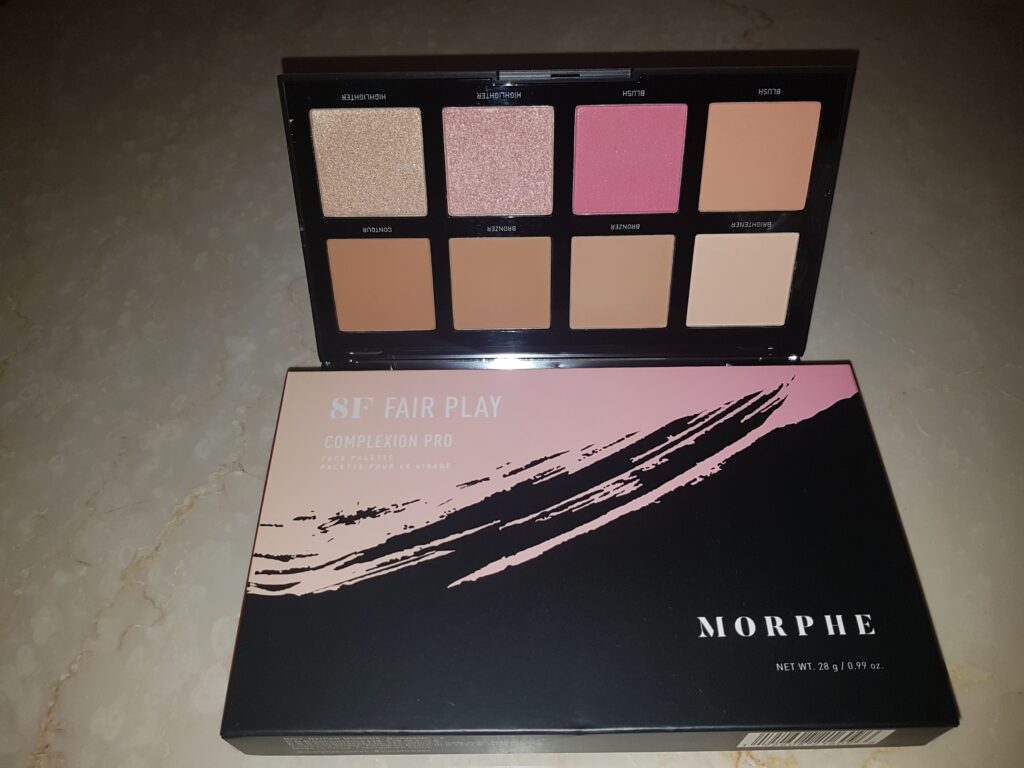
If you are new to these techniques, you might want to try starting with powder products at each stage. As you become more skilled you can try what I teach in my 101 Masterclasses.
Before you set your foundation with powder you can go in with cream products first, then apply your translucent powder & finish off going over your bronzer, contour & highlight with a powder version of the same. This adds longevity to your makeup & requires less touch ups.
This is my secret to keeping my clients’ makeup fresh all day; what I apply at the beginning of the day is there at the end.
Where to Bronze
Remember this step is to warm up the skin & give us a healthy glow.
I like to add bronzer to the top of the forehead & blend into the hairline, across the top of my cheekbones & a dusting across my nose. Think of all the areas of your face that the sun hits naturally.
Where to Contour
- Colours should be grey or cool toned
- Always blend well especially into the hairline
FOREHEAD
The anatomical rule of thumb, if you can fit only 2-3 fingers between your eyebrows & your hairline, you probably don’t need to contour this area. If you can fit 4 or more, you should be contouring to make your forehead look shorter. Your goal is to create a more oval shape to your face.
CHEEKBONES
Using your own anatomy as a guideline is fail proof. You are going to measure with your fingers. Take 2 fingers & place them next to the corner of your mouth, this is as far into your face as the contour should come. You are actually going to go right along the edge of the bone, a little higher is better than too low.
Not every mature woman needs to contour her cheekbones. If you already have natural shadowing under your cheekbones, please don’t contour this area. You will look thin & gaunt.
LIPS & NOSE
To create the illusion of a fuller lip, take your contour product & trace around your natural lip shape, blend until it becomes a subtle shadow. I tend to just do this to the lower lip. The choice is yours.
For your nose, it’s as easy as drawing a number 1 down each side. If you want to narrow your nose, bring the 1’s closer together. If you want to widen your nose place them further apart.
JAWLINE
Take your contour product along the corner edge of your jawline, trace it all the way back to the edge of the ear. Then blend, blend, blend until it melts into the skin & creates a subtle shadow.
Because most of us Girls over 40 can have a little sagging in this area, I place contour where the neck meets the chin. I do this on myself & my clients, it’s a great technique for slimming down the face.

Where to Highlight
- Use colours 2-3 shades paler than your foundation
- Your concealer is perfect for this
- Set with a powder lighter than your face setting powder
FOREHEAD
If you’re hollow in your temple area this is a great spot to highlight along with the centre of the forehead.
I also like to apply highlight just above the brows.
CHEEKBONES
Highlight along the top of your blush.
LIPS & NOSE
Add highlight to the centre of your nose & the cupids bow above the lips.
Now’s the time to experiment, remember it’s only makeup & it washes off if you make a mistake. Every new skill takes practice & this is a great way to get to know the bone structure of your face & how to enhance it.
As wedding season slowly winds down, more appointments will become available for 101 Masterclasses.
PS I’m always here to offer you advice & answer your makeup related questions.